Search
Close this search box.

Queues- Getting Started

Getting Started

Are you trying to find a way to automate live streams in sequential order?

Queues are the feature you are looking for in your seamless scheduled streaming. The Queue feature single-handedly encodes and live streams from your server channel, files, playlists, or other sources like UDP, HTTP, or RTMP links to the assigned streaming destination.

7 perfect ways the Queues feature offers to schedule your live streaming events are:

  • YouTubeYou can automate your YouTube videos to streaming destinations.
  • Channels- You can automate your Livebox server channel’s videos to live stream to the required destinations.
  • Pull HTTP Link, RTMP, RTSP-  You can pull HTTP, RTMP, and RTSP live sources and automate them to live stream.
  • Push from H.265 RTSP–  You can live stream the H.265 RTSP live source and automate it to the required destinations.
  • UDP-  You can automate a UDP link to streaming destinations. 
  • Files- You can automate the saved files from the Livebox server or upload files from your local drive to live stream to other streaming destinations.
  • Playlist- You can automate a playlist by creating the playlist from the available videos in Livebox queues and live stream it to streaming destinations.

How to Create Queue and add Tasks?

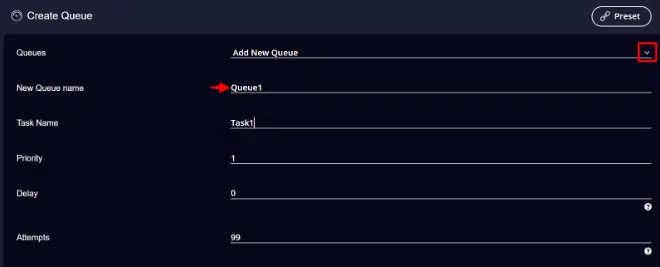
To Create a Queue, follow the below steps:

  • Go to the Queues feature from the Navigation Menu.
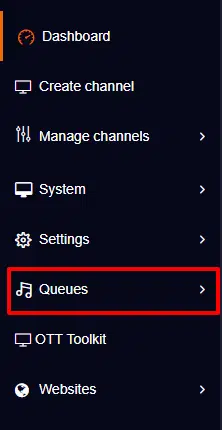
  • Under Queues, click on Create Queues option.

queues feature

You’ll be on the Create Queue page.

  • To add a new Queue, fill in the New Queue Name, Task Name, Priority, Delay, and Attempts.


Note: 

  • Task Name: You can create multiple tasks under each queue. So to identify your tasks from one another, give a unique name for each task. E.g, Task 1, Task 2, Task 3, etc.
  • Priority: You can set priority for every task to play in sequential order.
  • Delay: You can set the time interval between the tasks you add. It decides the time interval a task takes to start after the previous task completes its running time.
  • Attempts: You can set the number of times the server attempts to connect to play a video during times of interruption or network issues.


After entering the Queue and Task details, you can scroll down to add your source and destination settings.

Source & Destination Settings

How to add a Source and Destination for a Queue?

Now, after filling in the queue details, under the Source section, select the source based on your streaming needs and click on the  Next button.

  • You’ll be taken to the Destination section on which you can select your preferred streaming platform and a preset specified for each destination option.
  • Then click on the ADD button to add the task to your queue.


Your new queue gets created.

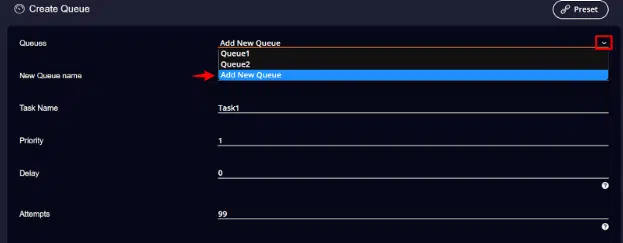
How to create multiple Queues?

To create the next set of queues, 

  • Select the Add New Queue option by clicking the drop-down given on the Queues option and follow the Create Queue procedure to add multiple queues.
Similarly, you can keep adding a series of queues with multiple tasks.
You have successfully created a series of queues in the Livebox queues feature.
How to add a series of tasks?
After creating a queue, go ahead by adding the series of tasks to the same queue by selecting the specific queue name you wish to add to your task.

You have successfully created a series of tasks under a particular queue.

QUEUE SCHEDULING SETTINGS

After adding the tasks, you can Schedule your queue in the Queues Dashboard by turning on the Schedule option in the Queues Dashboard.

  • Set a date and time you wish to stream your video, then click on the Save Button. 
  • The date and time will be saved in the Livebox server and the videos will be streamed following the scheduled date and time.

Loop- This option allows you to stream a queue on a loop.

Preset Settings

The Preset option located on the right corner of the ‘Create Queue’ page decides the resolution of the video you wish to stream. There is a preset option for every streaming option you choose. There are default preset options given for each streaming option. We recommend using the default presets of the Queues feature. 

In case you want to create your own presets, 

Click on the Preset button located in the top right corner of the “Create Queues” page.

  • Add on the audio and video values to create a new Preset. 
  • Click on the Save Preset button to create your preset option.

The preset gets added.

You can now get started with the Queues.

Related Articles