Multi-Bitrate Streaming Using the Livebox Playout and Encoder
How to conduct Multi-bitrate Streaming Using the Livebox Playout and Encoder?
To conduct Multi-bitrate streaming using the Livebox Playout and Encoder software,
Create your channel in the Livebox streaming server.
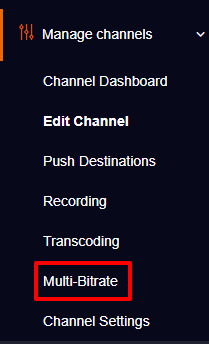
Go to Manage Channels from the navigation menu. Under manage channels, select Multi-bitrate.
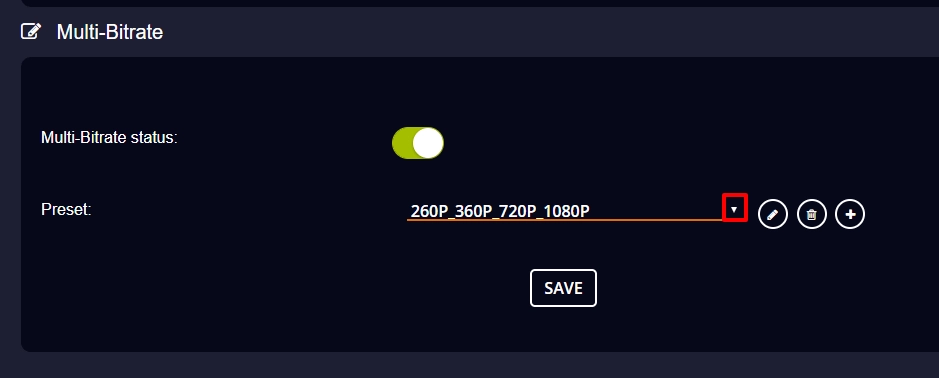
In Multi-bitrate page, select your channel and turn On multi-bitrate.
Once you turn on Multi-bitrate, the preset options will appear. You can set the required resolution and click “Save”.
Note: You also have an option to edit or set your required preset.
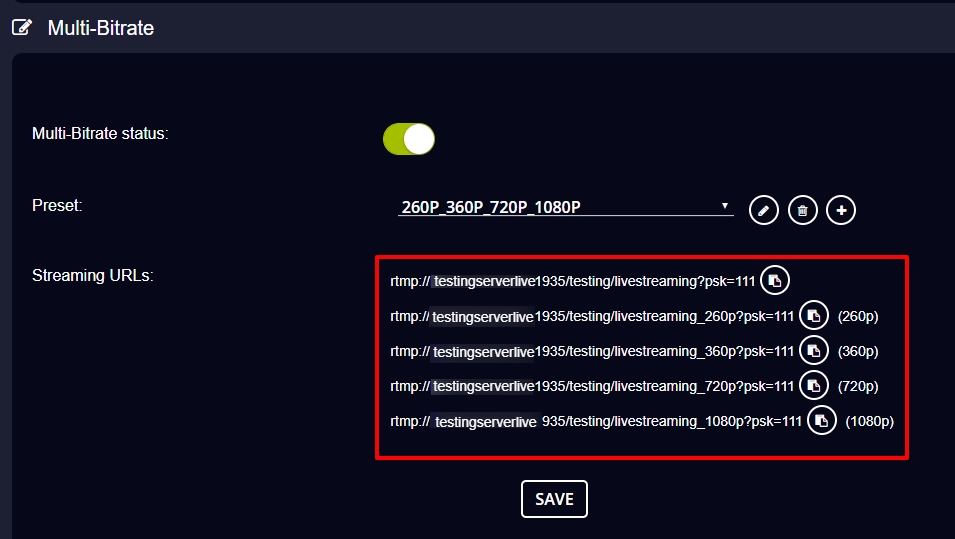
Once you click save, RTMP URLs for your resolution gets listed below. Make a note of the required RTMP links and click “Save”.
With each URL of definite qualities (resolutions), the player will adjust video quality to that of viewers bandwidth.
*The first given URL is the RTMP URL of your channel. The remaining URLs are RTMP URLs with resolutions.
Note: The RTMP URL should be used to initiate the live streaming on your server channel. And the other RTMP URLs of resolutions can be used to deliver the same streaming content in different resolutions.
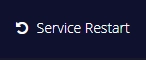
After clicking save, give “Service Restart” to get your changes applied.
Now access your Mixer and Playout software.
Note: Make sure to open the Playout/Mixer window first and then open the Encoder window.
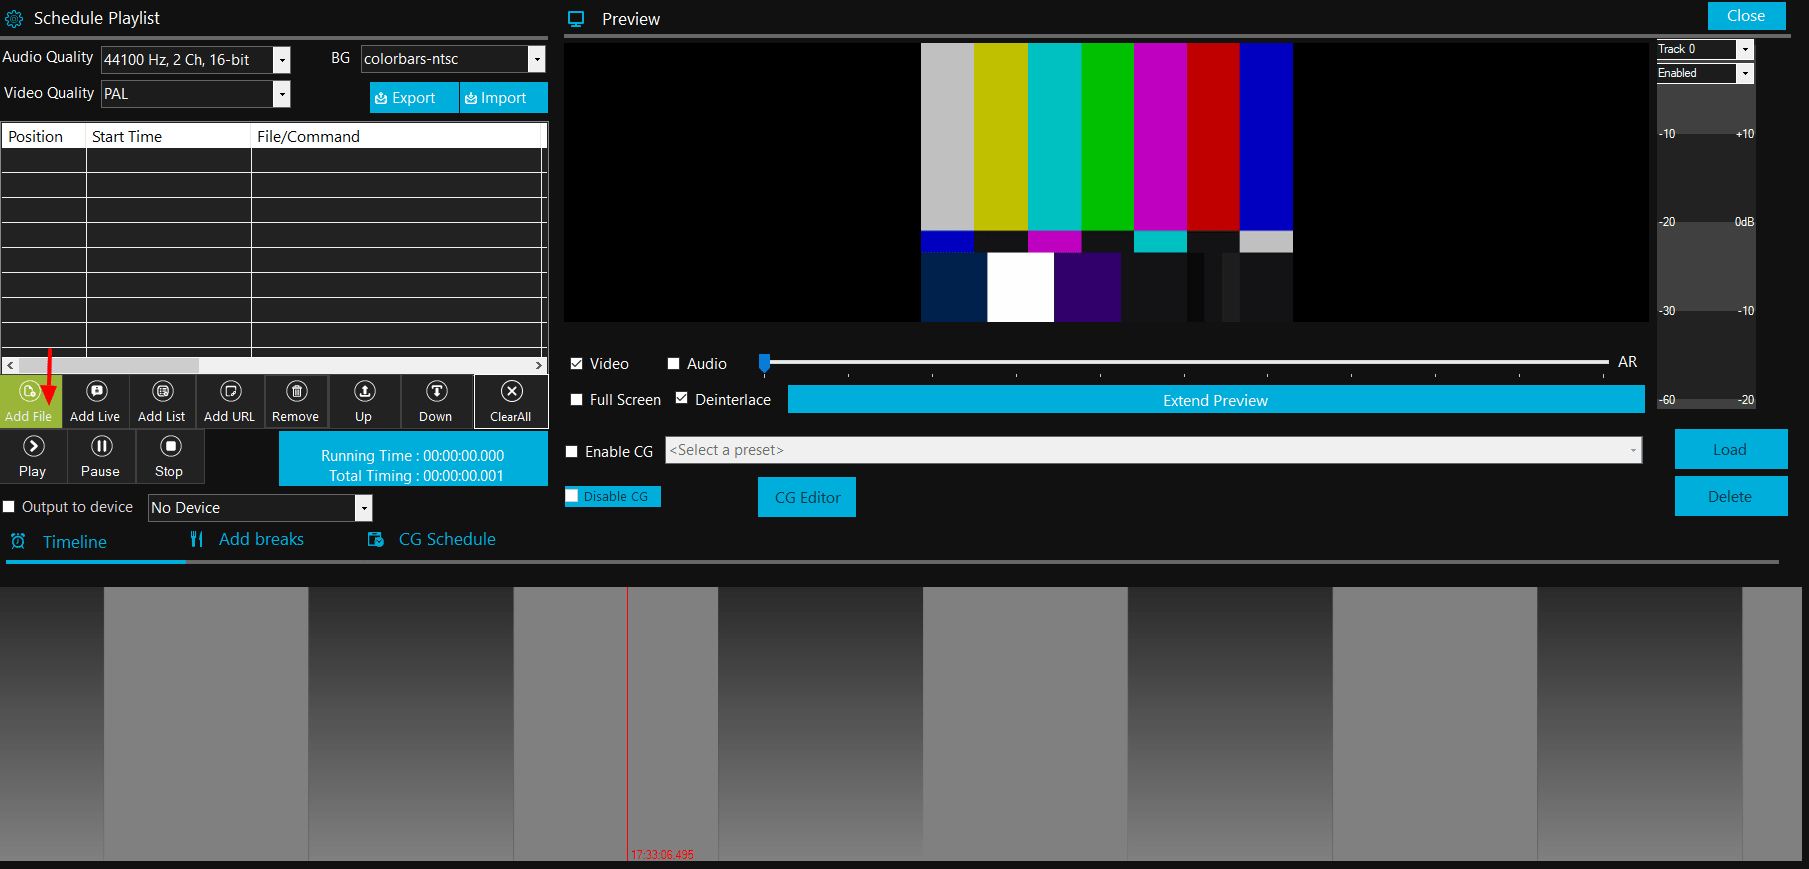
In the Livebox Playout software, click “Add File” to browse video source from your PC and to add video source in your Schedule Playlist. (You also have the option to add your camera source and YouTube URLs through the Playout software)
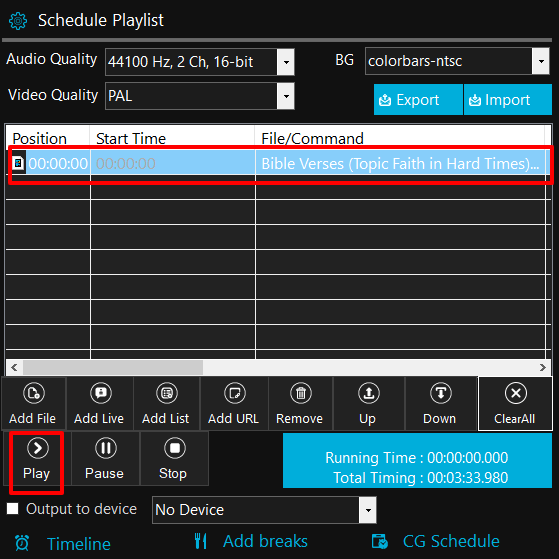
Your video source is added. So, now click “Play” to play your video in Playout Preview.
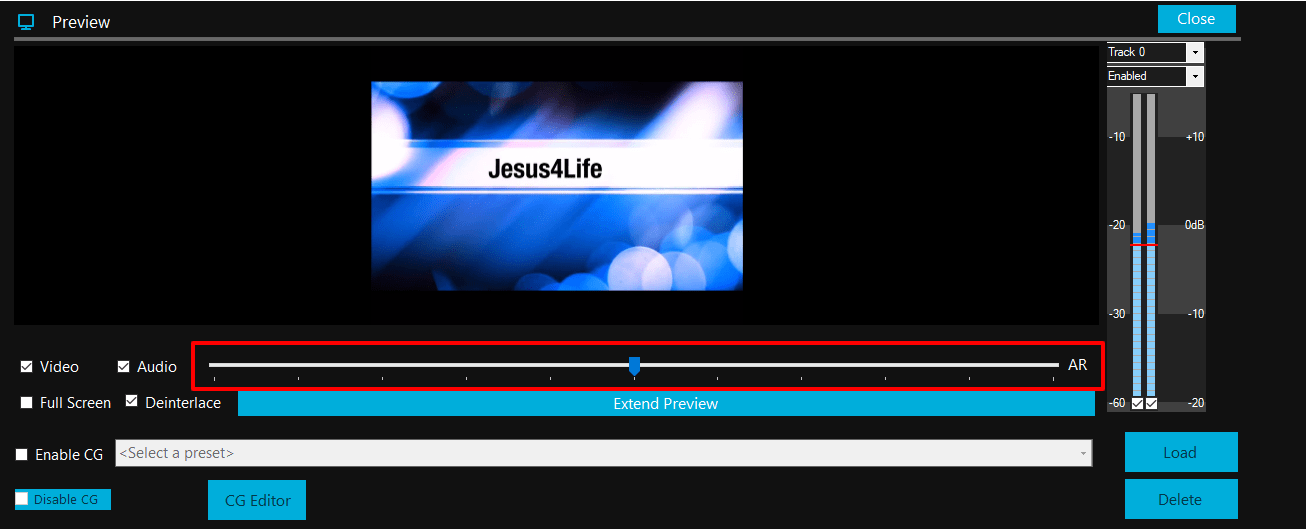
You can preview your source and also enable and adjust the audio of your video source.
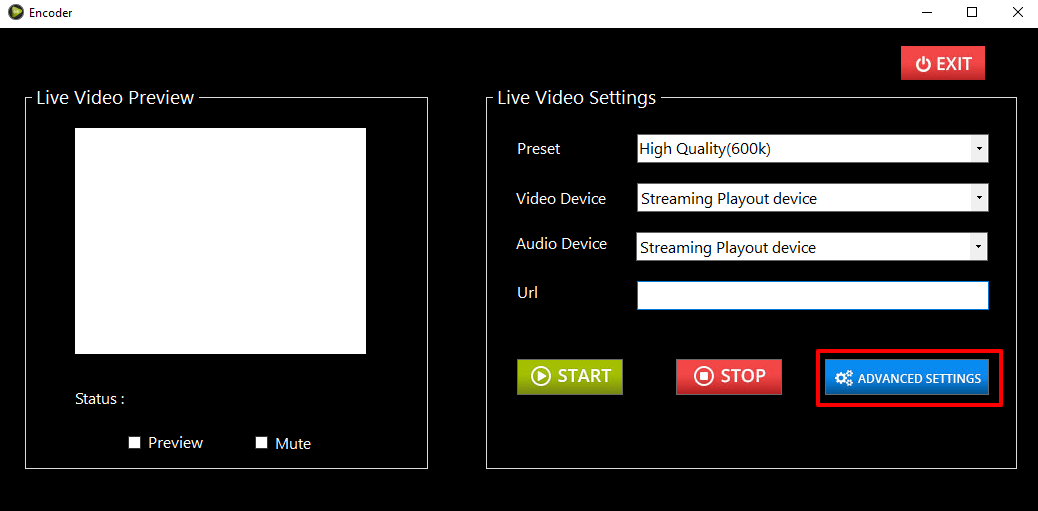
Now on the Livbox Encoder, go to the “Advanced Settings”.
On the Encoder Advanced Settings, click the drop-down menu to set the preset as Multibitrate.
You can enable (select) the “Preview” option after selecting your video device.
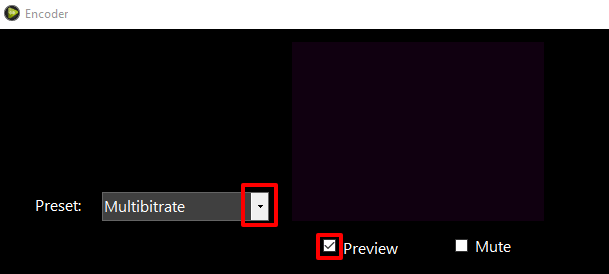
In Video Settings, enable the video option and then select your “Device” as Streaming Playout Device.
Copy the URLs from the Multi-bitrate settings and enter it in the given URL bars. Then set the bitrate. (Give the bitrate same as the resolution of the RTMP link you have entered in the URL bar)
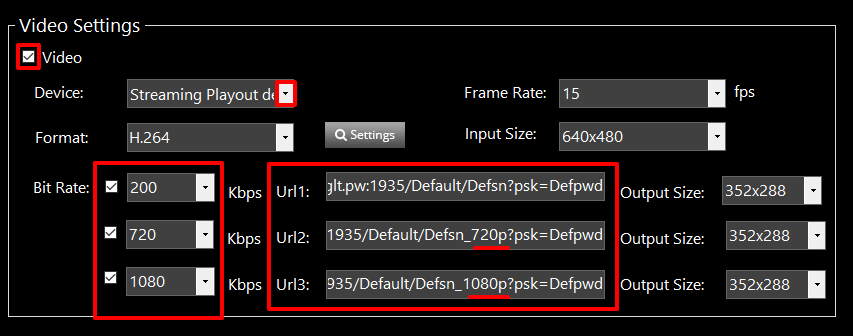
In the Audio Settings, enable Audio and select your Audio Device.
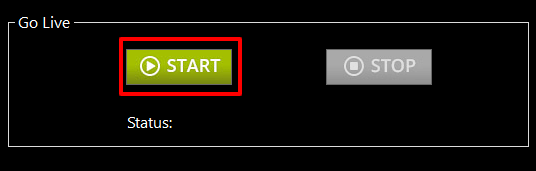
After setting up all these options, click on the “Start” button.
Once the streaming is started, it shows the Streaming Started status below the Start button.
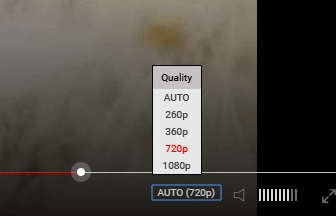
To view your live MBR streaming status with the definite video quality, go the Livebox Dashboard and check on the player.
Then go to Viewers Report to check the RTMP stats of your streaming channel. It shows audio and video bitrate of your channel.
You have successfully done your Multi-Bitrate streaming using Livebox Playout and Encoder. Now you can start to stream the resolutions achieved source on your streaming platform/ social media destinations.
1080p, 240p, 420p, 720p, Free encoder software, Free inbuilt streaming software, In-built Encoder software, Inbuilt streaming software, Livebox Encoder software, Mixer software for mixing streams, Multi bitrates, Playout software, streaming at multiple bitrates, streaming at multiple resolutions, streaming Encoder