How to Create a Sub-user on the Livebox Streaming Server?
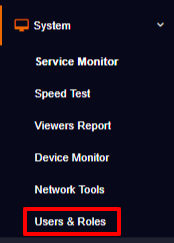
Go to System from the navigation menu. Under the “system,” select Users & Roles.
In users & roles, go to ‘Add Role’ and click the ‘Create Role Now’ button.
A dialog box ‘Add role’ gets opened.
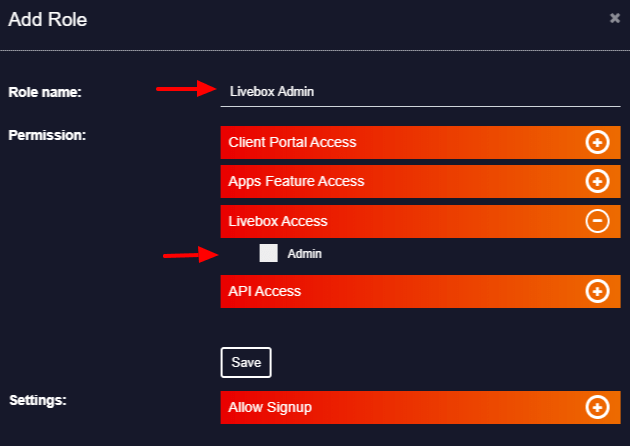
In ‘Add Role’, enter a role name for your user.
Then on the Livebox Access, select the ‘Admin’ option to give admin control to your sub-user.
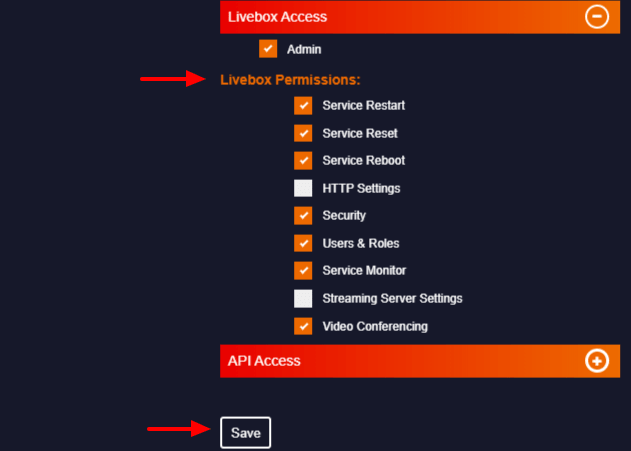
After selecting the admin option, a few more options appear, where you can Select Livebox services for the Livebox Access role.
Then click on the ‘Save’ button.
The role of the Livebox access is created. Now go to ‘Add User’ and create a user for the Livebox access role.
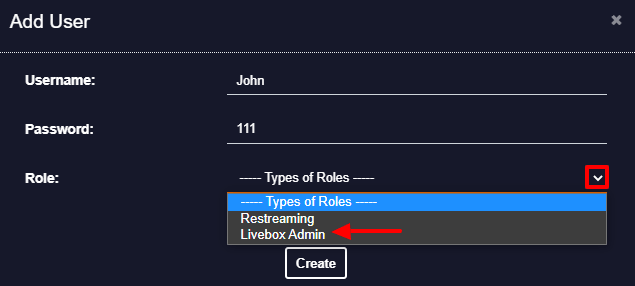
Enter the Username and password for your user.
Then select the role you have created by clicking the drop-down menu.
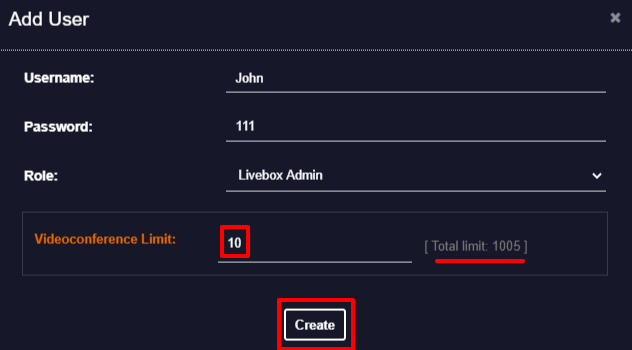
Then you have to set the Videoconference Limit i.e., the number of conferences that the user is allowed to create while using the Livebox Videoconferencing app.
Then click the ‘Create’ button.
Now go to ‘User List’, where you can view the Livebox Access role for your user is added successfully.
Provide the credentials to your user.
admin controls sub-user, admin shares powers with Sub-users, Limited access to the streaming server, Streaming sub-user, Sub-users accounts, Sub-users roles