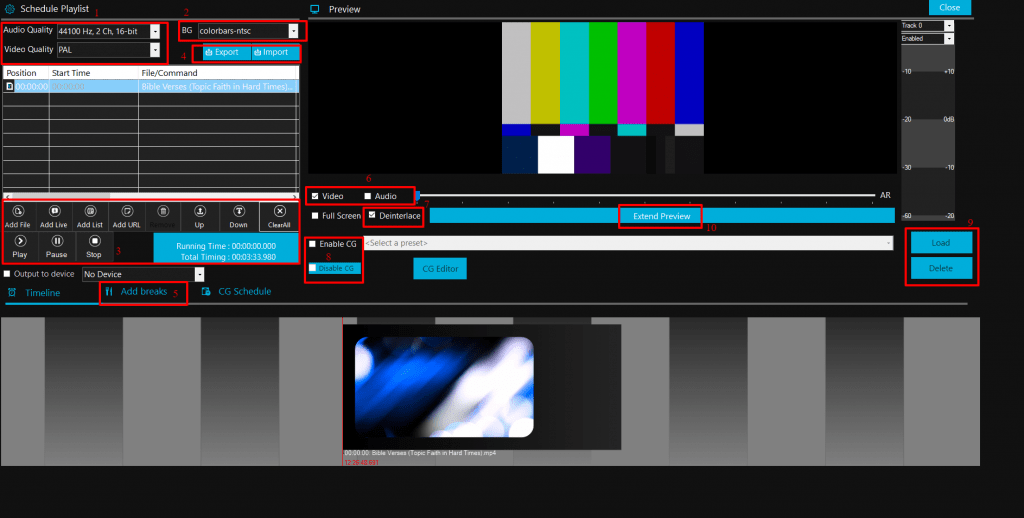
- Set your audio and video quality by clicking the drop-down menu provided in Audio Quality and Video Quality option from the top left corner.
- Set the background in your preview area by clicking the “BG” option.
- To add your video source in the Schedule playlist,
- Click the “Add File” option to add your local files for live streaming.
- Click the “Add Live” option to add your professional camera source.
- Click the “Add URL” option to add URL from any other media platforms.
- Click the “Add List” option to add a list of files.
- Click the “Remove” option to remove your files from the playlist.
- Click the “Play” option to play your added source in the preview area.
- Click the “Pause” option to pause your source.
- Click the “Stop” option to stop your source.
- You can save your Schedule Playlist settings by clicking the “Export” option and the same way bring back those settings by clicking the “Import” option.
- Click “Add breaks” to add intervals between your live streams.
- You can also add audio source the same way you do for adding your video source. If you add any audio source, then enable “Audio” option given below the preview area. Use the scale to adjust the volume.
- Always enable Deinterlace to avoid interlacing of your sources.
- Enable CG Editor and then click the CG Editor option to add edits like the ticker, scrolling ticker, crawling ticker, rolling ticker, date and time to your source.
- Once you do all your edits in CG editor, then click “Load” to save your edits.
- Click “Extend preview” to view your preview in a separate window and in full screen.