How to Live Stream on Livebox Using OBS Studio as an Encoder?
Livebox streaming server offers a smooth and uncomplicated streaming workflow. Its flexibility can be witnessed while working alongside distinct encoders.
Here with which few steps are listed for crystal clear understanding of streaming workflow by using OBS studio.
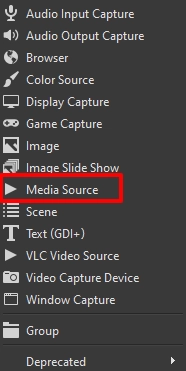
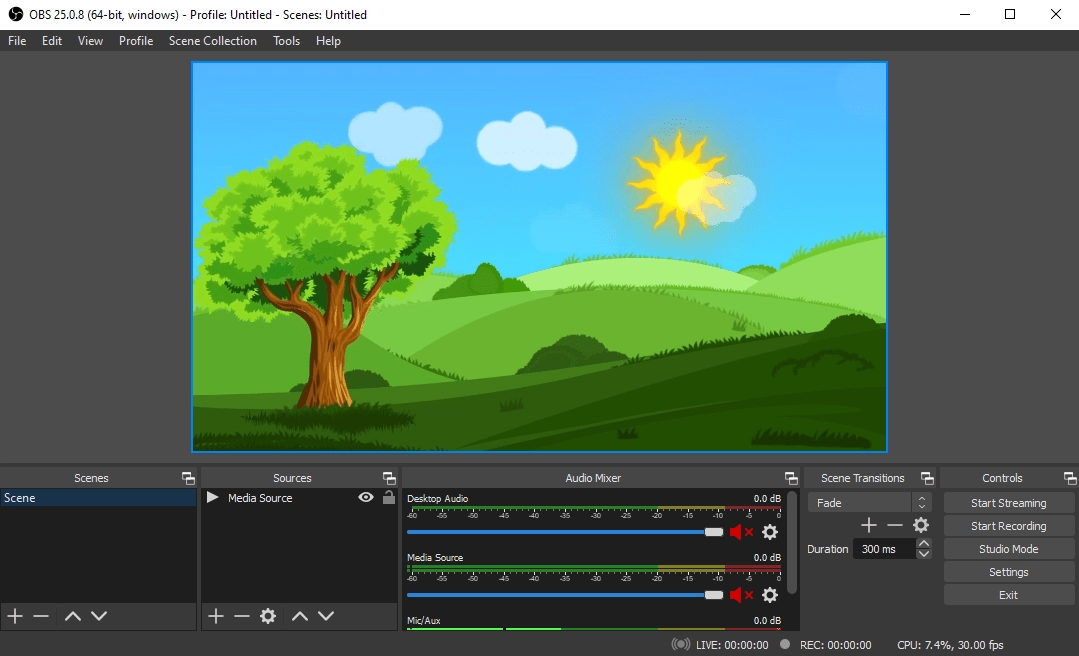
Go to OBS studio and click the add icon from the tab “Source”.
A pop-up menu with the listed options will show up. From the listed options select “Media source”.
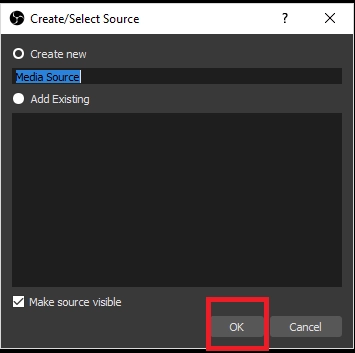
A dialog box “Create/Select Source” gets opened where you can name and set as per your requirements and then click “OK”.
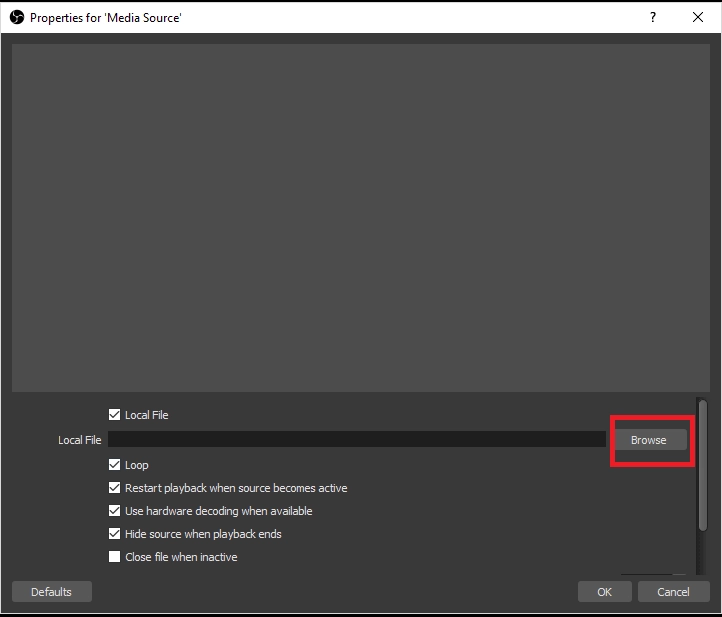
A dialog box “Properties for Media Source” gets opened. In “Properties for Media Source”, select the required options for your streaming and then click “Browse”.
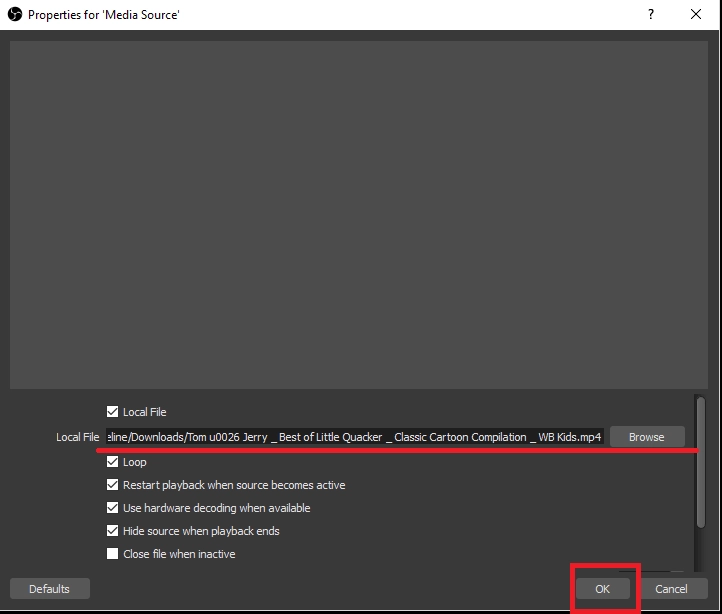
Once you click to browse you get accessed to your local files where you can browse and select your source. Then Click “OK” and your source is added.
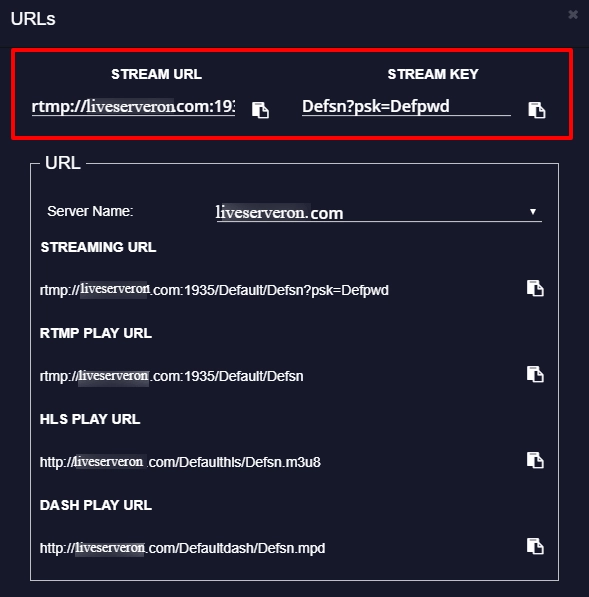
Now go to Livebox and select Manage channels from the navigation menu and click Streaming URL button to copy the Stream URL and Stream Key.
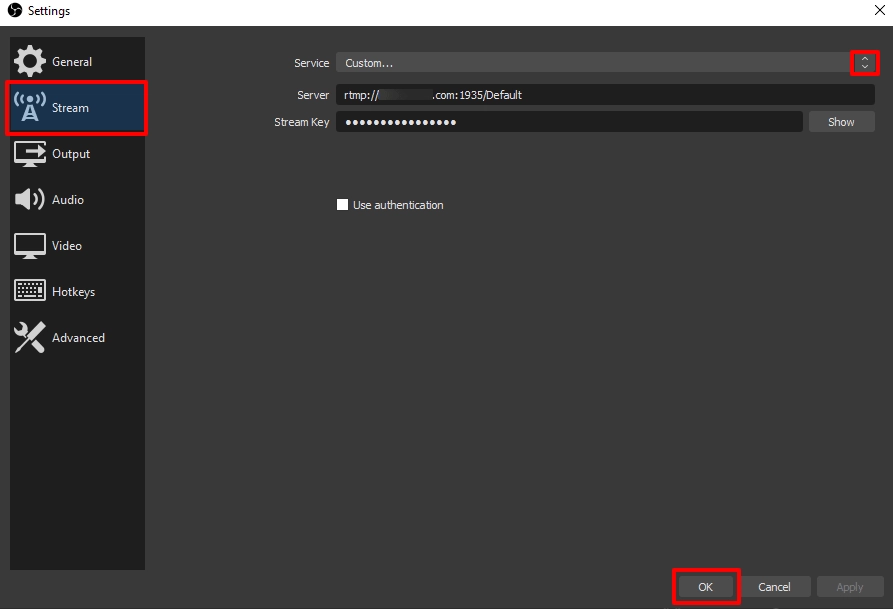
Then go back to OBS studio again and select “Settings” under the menu “Controls”.
On the “Settings” tab, go to “Stream” settings from the menu.
In Stream settings, select the “Custom” option and then a paste the copied Stream URL and Stream Key.
Then click “OK”.
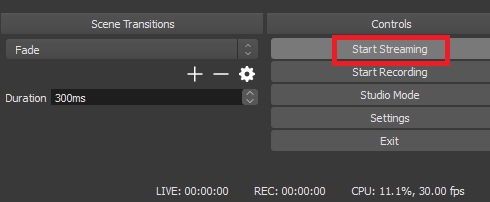
Now click the option Start streaming under the menu “Controls”.
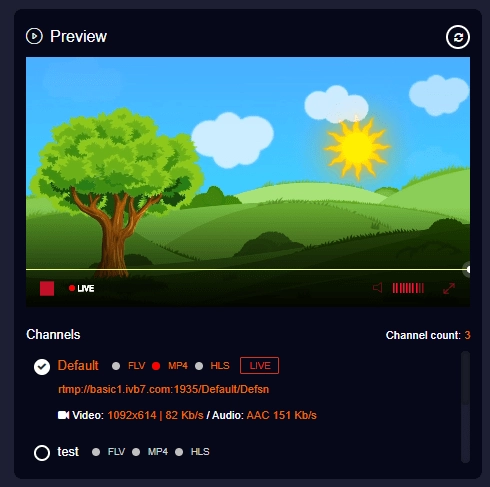
Now go to Livebox Dashboard and preview your streaming source.
Then from your streaming channel you can push live the streaming source to your social media destinations, websites, blogs or any streaming platforms.
Thus, these simple steps can help you out to accomplish your first streaming process. Happy Streaming!
best live streaming server, live streaming, live streaming using OBS studio, Livebox streaming server, OBS streaming software